Tech Tuesday

Finds and Thoughts about Tech Integration

Concrete Poetry and so much more

April15

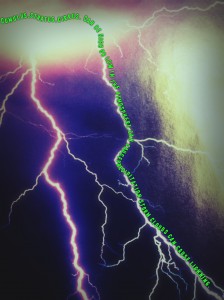
A few weeks back an app went FREE and caught my eye: Path on – Swipe to Type.

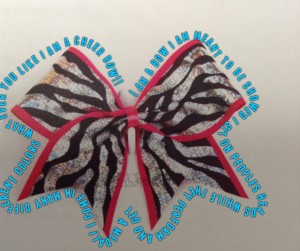
Immediately, I saw a good elementary school use: concrete poetry. And the app’s so easy…

  • Snap a picture.
  • Draw some lines.
  • Type your text (and it will follow the line path).
  • Choose a font and effect. (In fact, there are so many fonts and styles to please just about everyone and to make sure that the words are easy to read for an audience.)
  • Share.

I must note the one drawback so far: no spell check.

Here are some student poetry examples by third and fifth graders:

Pathongr3ex1

Pathongr3ex2

2014-04-01 09.10.01

2014-04-01 09.20.21

Of course, this app becomes even more powerful when you stretch your imagination of going beyond just a still photo.

Since a Path on – Swipe to Type can be saved to the Camera Roll, the image may be used in many other apps and multimedia ways. Here are three quick ideas:

Here is an example of a “book” (PDF) made with Keynote and Path on – Swipe to Type images during a Colonial Academic Choice. (I also love how hands-on this project was with student made props!)

Path on – Swipe to Type‘s slogan: Give your pictures a thousand words- whatever and wherever you want!

I couldn’t agree more.

The creation, critical thinking and communication possibilities are endless.

PicPlayPost Palooza

March18

In the last few months, when I have consulted with teachers, I have found myself recommending over and over again the same app… and it seems like it’s been a non-stop party of great projects.

So what’s the app?

PicPlayPost is its name, and it’s very simple to use. You pick a frame of up to 6 spaces and plug-in pictures and/or videos. Then the frame or media collage can be exported and shared to your outlet of choice, such as a blog or webpage. While the end product can be impressive, the real power is in the process and preparations that students undertake. Essentially, students have to pull together items on a topic, making a synthesis of learning.

What do I like about this app, or better yet, the idea of media collages?

  • Non-subject specific: PicPlayPost or the concept of a media collage works with any topic.
  •  Paper and glue are not obsolete: Students can be very hands on using this technology. Students can make or find props to snap pictures of to include in the media collage. That means students still can build models and dioramas and/or color their own posters by hand if desired. There still is a lot of value in the old school creation process, and I know that many teachers do not want to abandon manual tasks. These pieces also can be a great home component to a media collage as the pieces come in on a specific due date, get photographed and then go right on back home (instead of taking up non-existent classroom space).
  • Planning is key: Making a media collage requires planning on the student’s part. Important choices have to be made in what will be displayed. Students develop decision-making skills as well as organizational and time management skills in order to assemble the overall product. PicPlayPost does not help students make the pieces of the collage; it is just a shell to share them. A lot of thought, energy and creativity have to go into how a student will show his/her knowledge on a subject. Research has to be completed; scripts drafted; reading practiced; and props designed all before even using a camera.
  •  The camera is the BIG tool: The app does not require anything more than simply using the built-in camera of the iPad (Mini). The camera roll is accessible within PicPlayPost, so if you can get what ever you have made to the camera roll, you can put it into your media collage. That opens the door to being able to use other apps (iMovie, Tellagami, Funny Movie Maker, Explain Everything) to create pictures and videos that are sent to the camera roll and then able to be inserted into the media collage.
  • Communication matters: Students still have to explain their learning with a media collage but through pictures and video. This medium is a nice change from the traditional report, which quite honestly, is not very exciting for an audience outside of teachers. Students are working on speaking clearly with expression as well as developing reading fluency.

At the bottom, please take a moment to visit each of these media collage projects that have been created at Abbot over the past few months. Some have been shared previously, but the last four are new!

Final thought: If a picture is worth a thousand words, then how much is a media collage?

Ancient Civilizations

MA Regions

Wampanoag Models

Folktale Comparisons

Zoo of Wildlife

Planets

The Museum

Game Changer

January21

Technology can be a good avenue for producing a polished piece of work that can be displayed proudly to a large audience. Today’s tech tools can assist even the youngest student in achieving a professional and sophisticated look. Honestly, it’s never been a better time to showcase a student’s work and knowledge at the end of a unit.

I think we do a good job of designing and guiding these culminating experiences for students. What certainly helps is the ease of use of the tools. I’ve noticed that we tend to get into a traditional scenario: draft a story, then use a tool to publish that story; research a topic, then make a technology aided project sharing that research; etc.

Don’t get me wrong. I believe that this is a solid method for learning and a legitimate use of technology. I collaborate on a multitude of these projects that are a tremendous synthesis of student learning and lend themselves to sharing and commenting experiences beyond the classroom walls. However, this year, outfitted with iPad Minis, I also have been suggesting during consults (when it’s appropriate to the curriculum objective) that we harness technology in the moment to make student thinking visible, and this kind of tech integration is often not so polished.

I briefly have mentioned a screencasting app (ScreenChomp) in the past (post here). At the Boston iPad Summit, one versatile app that was highly recommended (and a must have if you were going to spend money) was Explain Everything. This screencasting app is very much like ScreenChomp or Educreations, but on steroids. Explain Everything does exactly what its name implies: Students can set up slides with words, pictures and videos and then record their thinking via voiceovers and pencil/pointer movements over elements. The result is a movie that shows exactly what students know (and don’t know) about any topic, and my proposal is that this tool does not have to wait to be used by a student until the end of a unit.

For example, I recently worked with a colleague, Chris Stanvick. She used Explain Everything with her fourth grade students during math (as a station) to find out what her students really knew.

Here is the teacher example that she created :

I’d like to share some feedback that I received from Mrs. Stanvick once the students were finished with their own screencasting movies. Below is her response to my follow-up question, “What worked?” It provides some background and should give you a good idea of what we wanted to accomplish and how we went about it.

‘The FDVP project was another opportunity for students in my class to work with fractions. However, this time around there was a shift in the “purpose” of the assignment/project. Rather than having the children produce a final product that was meant to be perfect for public display, the goal was to have the children illustrate and verbalize their understanding of how to change a fraction (reducing it if possible) to a decimal and to a percent. They also had to shade in on a grid of 100 squares what the fractional part represented. Students used iPad Minis to demonstrate their understanding. Each child had an opportunity to practice what he/she might draw and say prior to the recording, but there was no set script and each student had to rise to the occasion when it was time to move from one type of number to the next (fraction, decimal, visual, percent, aka FDVP.) Six or more students could record simultaneously and were left to their own devices (literally!) to complete the project. Ms. Sanderson had created a detailed direction sheet, which she had introduced to the students the day prior to the recording. Students worked efficiently and we were able to have everyone in the class record his/her explanations in a little over an hour… Ms. Sanderson circulated among the recording students to troubleshoot, but more often than not she placed the power of solving the problem back to the students by asking them if they had looked on their direction sheets, etc., (“Where on your direction sheet will it explain to you how to solve that problem or answer that question?”)’

In response to my request for “any comments or suggestions”, this was Mrs. Stanvick’s response:

‘Initially I was uncomfortable knowing that my students’ work would be recorded but not necessarily perfect. This activity made me, as an educator, realize that technology isn’t always about producing flawless work, but can be used, as well, for purposes of evaluation. Lisa created a file of my students’ projects for me to look at immediately. At first I started analyzing each one by myself and writing notes about what each student could have said or what he/she omitted, or what wasn’t quite clear, and then I realized that as the children worked on another project independently, I could call them up one at a time to view/listen to the explanations together with me. This provided each student with immediate feedback, and also gave me an opportunity to take notes so I now knew where along the process comprehension might have broken down. Often it was the case that students were misusing or omitting specific math vocabulary, not so much that they didn’t understand how to transfer from F to D to V to P! Now that each child has received 1on1 feedback I would like to repeat the procedure, giving each student a different fraction, to see if the second time around their work (explanations and drawings) is more accurate and clear.’

Mrs. Stanvick went on to thank me ‘for opening (her) eyes to using technology to evaluate student work.’ However, I want to thank and congratulate her on taking a risk and using technology in a less polished way. With a screencasting tool, we are able to get insight into student thinking and inform our instruction while we are knee deep in the learning. In my opinion, this tool is a game changer and should not be overlooked.

Read Our Lips

November5

Recently, I attended an excellent MassCUE workshop presented by Timothy Harkins that focused on integrating iPads into elementary science. This session reinforced the idea that it’s best to choose a few apps and use them for many purposes. From this session, one easy to use app that I added to my must try list was Funny Movie Maker.

This app lets the user create a 3o second talking avatar movie. The gist: use a pre-made picture in the app or snap your own. Cut out a mouth in the picture, and then record yourself or someone else’s mouth doing the talking. This movie can be shared to Photos (and then accessed from the device via Dropbox), or emailed right from the app. The exported movie file can be inserted on a blog or web page for an audience.

One word of caution: the available pictures in the app’s library can be a little suspect… and even strange… imagine muscle men and a lot of fruit. Therefore, taking your own pictures with the camera seems like the best option. Students can create a hand drawing, make a clay figure or use a toy figure to depict their character/subject.

This app can be used for any content area, letting students report research findings, explain their thinking or explore a different perspective. Any object can be personified and given the chance to speak its mind, inspiring creativity.

On Halloween, some fifth graders participated in a voluntary project: create a pumpkin to represent the main character of a biography or “boo-ography”. On the spur of the moment, we seized the opportunity to bring these pumpkins to life with the Funny Movie Maker app.

So, go ahead and read (or rather, watch and listen to) our lips!

(Please double click on the embedded movies below.)

Documenting those Hands-on Projects and Portfolio Artifacts

June4

As the school year is drawing to a close, lots of student projects are still streaming in. I’ve noticed that many of these projects really have no technology involvement. And that’s OK. Technology should not be used for technology’s sake. If a student built diorama or growing a live plant gets the job done for the content objective, that’s fine. However, what I would like to propose is how we can document this great learning that is taking place with these projects. Sure, pictures can be snapped and stuck in a portfolio binder or made into a quick slideshow to be viewed by the class or even parents who visit during an end of the year sharing day. Putting together a slideshow in iPhoto is fairly simple. Music can be added. Great. But what if you wanted to take it a step further without a whole lot more work? Even get the students involved in capturing their learning? Allowing more student reflection to take place in the process?

Today, I read a blog post on Richard Byrne’s iPad Apps for School about 30hands. This is an app for iPads and Touches that lets you create slideshows quickly and share them easily. What I envision is having students snap pictures of their projects or portfolio items using our iPod Touches and then recording their voices explaining their projects and learning. This app allows the user to make simple drawings as well right in the app. Therefore, diagrams and important points can be made into visuals right in the presentation (usually we have to find another drawing app or hand draw and snap a picture of it to insert). The app also seems to be very forgiving of mistakes. Perfect for younger students! The presentations can be sent to Camera Roll and uploaded to our Dropbox account for easy sharing from a computer/projector set up. These presentations also could be posted and shared on a wiki or blog. All without an account to 30hands. Again, perfect for elementary age students.

Here is a tutorial of the app:

You also can download a similar tutorial to watch right within the app. It even highlights updates to the app.

So something to think about in these last few weeks… The Touches are waiting to help you!


« Older EntriesNewer Entries »

Skip to toolbar