Tech Tuesday

Finds and Thoughts about Tech Integration

How Will I Make 2015 The Best Year For My Students?

January6

A pinch of this and a dash of that…

Perhaps, too many holiday cookies have put me on this train of thought, but wouldn’t it be great if there were a recipe that would ensure that 2015 were the best year for our students?

However, individuality (thank goodness!) makes things a bit more complicated. Everyone has to follow his/her own recipe for success because if it’s like my grandmother’s cooking, things are never exact, written down and usually change depending on what’s available in the kitchen.

Therefore, I see my role as a digital learning specialist as that crazed restaurant manager… running around while juggling plates (a.k.a. devices) and consulting with staff (teachers) about how to meet the needs (learning objectives) of clients (students) at that moment.

Today’s Specials? Encouraging collaboration and creativity.

And of course, you can’t forget the side of passion. Who wants bland, right?

If you think I am just talking about the students, you are wrong. The most effective way to inspire the students is to inspire their teachers.

Teachers are the ones who create optimal conditions for the blending and mixing of learning. My job  is to seek, design, and support techniques and methods that will produce “edible” creations.

Do all ideas bake to perfection?

Honestly, no.

Yet, from that lesson, we all learn the importance of risk taking and self-reflection.

Now, those are the two core ingredients (skills) that will last and make years to come continue to be the best for our students.

posted under Thoughts | No Comments »

Long time, No Write

December2

So it appears that my blog has become a bit dusty…

What can I say? It’s been a very busy fall. Lots of new: Chromebooks, going totally mobile, Genius Hour, Google Apps For Education, Google Classroom, grant writing, a new keyboarding program, to name a few.

Last night, I saw a video that actually made me pause from all of the controlled chaos: “This Will Revolutionize Education“. If you haven’t seen it, it’s worth the 7 minutes.

It reaffirmed that all of the craziness of this fall is heading us in the right direction: Students need to take risks and reflect on their learning to make meaning. Students also need to collaborate and problem solve together.

Yes, there are many tools that can assist with these tasks. I continuously write/endorse/recommend/encourage tool use (as many other tech specialists do). However, we need to remember that it’s not really about these tools; it should be all about what we want students to achieve.

And how do we get them there?

I’m a week late, but I’m thankful for the caring teachers in my school who guide, coach and serve as role models on a daily basis, on this journey.

posted under Thoughts | 2 Comments »

Genius Hour

October7

I’ve always been a believer in Choice Time. We’re always telling kids what they should be doing at school, and it’s important for them to have some space to pursue their own interests. Making the time for that can be extremely challenging, however, due to curriculum demands. When I was a classroom teacher, my compromise was devoting one Language Arts block per week to academic choice within that subject. I especially encouraged students to plan and form partnerships to accomplish their own projects that often would continue from week to week. The result: kids no longer just looked forward to Fridays because it was the last school day before the weekend. My experience was that Choice Time ignited enthusiasm into even the most reluctant learners.

This year, some colleagues and I are taking a project based learning course. This endeavor has given us the opportunity to explore a concept that reminds me of Choice Time:  “Genius Hour”. Essentially, Genius Hour lets kids explore “passion” projects during their school week. The topics do not have to be tied to their curriculum. Plus, failure is an option. Learn more about Genius Hour here.  CNN also wrote a very good article that you may want to read.

Our version of Genius Hour is bringing two classroom together each Friday afternoon to explore out of the box thinking, creativity and team work. Our goal is for students to build the muscle this fall to be able to undertake their own projects mid-winter and spring 2015. An important part of our preparation is student reflection. One of the classroom teachers and I have been working on the power of metacognition and its impact on student performance (for our Educator Evaluation). Therefore, a Genius Hour blog that  chronicles the students’ journey has been created. Please take a moment to listen and watch the student posts that were created with iPad Minis and two apps, thus far: PicPlayPost and Explain Everything. I have written about the tremendous possibilities with these two apps as a part of the learning process in the past (Game Changer and PicPlayPost Palooza).

Your feedback is greatly appreciated!

Chromebooks – A New Adventure

September23

Yesterday I was greeted with one of Steven W. Anderson‘s “Awesome” tweets:

‘Good Morning! Don’t wait for everything to be right to make your move. Take a chance and see what happens! Be awesome today!’

This tweet really spoke to me… and our new adventures with Chromebooks.

I fully admit that I am an Apple person -both professionally and personally- so it really raises a few eyebrows and turns a few heads when I tell people that we are piloting a cart of HP Chromebook 14s this year at our elementary school.

And my response even when the learning curve feels particularly steep: “It’s not about the device; it’s about the learning.” (I first read similar words/ideas on Sylvia Tolisano’s blog a few years back, and they stuck with me.)

What do we want kids to learn in the core curriculum? Figure that out, and then choose your device to meet those objectives.

That’s exactly why we are trying to diversify at school with AirBooks, iPad Minis and Chromebooks – oh, my!

From a management/set-up point of view, it’s been tough. It’s a whole new world of setting permissions and having Chromebooks behave the way that we want them. Often forgetting these devices are not laptops! Going Google also has added a new layer.

New possibilities, new decisions; No where near perfection. But that’s OK. We ask students to take risks every day. It’s my turn. I’m sure that I will be filling this blog with lots of trials and tribulations with hopefully some great integration examples.

In the spirit of sharing, here are a few ideas/resources and scenarios that I’ve had to troubleshoot thus far:

1) The class isn’t ready to dive into their Google accounts… so I guess we won’t use the Chromebooks.

Knowing that our Google log-ins are quite lengthy, it will take a while for our third graders to get the knack for logging in. Therefore, I want us to be little kid user-friendly” with the Chromebooks by setting them up with a “public session“. Essentially, a log-in box appears on the main screen for students to click on and gain quick access to the Chrome Browser. (I named our public session “student” to mirror our student account on the laptops.) Why do I like this option versus just having students browse as a guest? I have discovered that you can not set a home page for guest. That essentially means the user has to start typing in an address or do a search. Not really desirable with young students. A public session lets us set a home page (just like our laptops’ browsers) that will be familiar and safe for students as they navigate through links on that page to the desired destination.

2) It says that the network is not available… what’s going on?

One of the first things I now show students when we get an orientation on the Chromebooks is how to choose a WiFi signal (AirPort). Coverage is definitely something that I will be discussing with tech support as these devices seem to require a much stronger signal. I have found that by empowering students to troubleshoot the switching of AirPorts has helped enormously with the flow of their work  (and keeping my sanity).

3) Do your prep.

Not all websites will work on Chromebooks due to plug-ins. Make sure to check out the desired site ahead of time on the device. It will save you a lot of  time and frustration. This also is an area I have to do some more investigating to see if policies can be set up in management… <An hour later>… OK: I did a little looking around Admin Console and noticed that you had to enable plug-ins. Looks like some sites that I didn’t think worked are now in business… see it’s a work in progress!

Any advice or thoughts from others who have been on this journey?

Free to Use or Share Continued

March4

OK, so you’ve found a picture that is labeled as Free to Use or Share via an Advanced Google Image Search. (See this previous post for a refresher or to get caught up.)

It’s now time for an investigation. Is the image really free to use or share? Google makes no guarantees. Therefore, you have to go back to the source.

How can you do that easily with students?

Click on the image in your Google Image Search. A preview window will open with some options. Choose the Visit page button.

Screen Shot 2014-03-01 at 2.56.46 PM

Once on the page, there should be information about the image’s licensing. If the image really is free to use or share, it most likely is licensed under Creative Commons. (You may have to click on the image again on the page to be taken to this specific information.)

Screen Shot 2014-03-01 at 2.57.55 PM

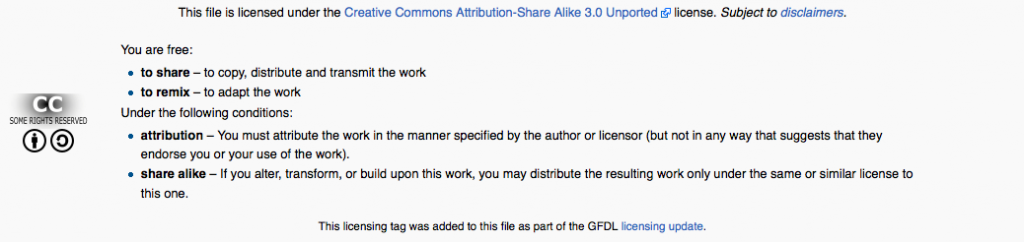
Read the terms of the license. (On this blog post, please click on my screenshot to get a better view.) It will tell you what you are free to do. If it states you can share the image, a student can use the image in a project that is printed or posted online. If it states that you can remix the image, a student can use the image in a project and even make some changes to the original image if desired. The license also will tell you what the conditions are for sharing, remixing, etc. (It is important to note that you may see some information regarding commercial use. Most likely this is something that we do not have to worry about with a school project.) If the license states attribution is necessary, the student needs to give credit to the author. Another condition that is often requested is “share alike” which means that the author wants you to pass on the same license to any changes you have made to work. In other words, let others know that they are free to use and share the image as well. Finally, when you go to investigate, some images may be listed as in the Public Domain which means you are free to use them for any circumstance without even giving credit.

Screen Shot 2014-03-01 at 2.51.37 PM

After reading the license if an image turns out to be free to use or share, what is your or the student’s responsibility in regards to giving credit on a project?

A formal citation really is intended for a Works Cited List at the end of a paper. Instead, a student should attribute the work below the image (or as close as possible unless it is neater to use a slide at the end of a presentation). Sometimes that information in its correct formatting is on the page where the student has found the work and can be copied and pasted quickly by clicking on a clearly labeled link, such as “Use this file”.
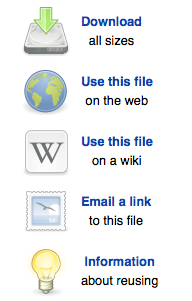
Screen Shot 2014-03-01 at 2.57.18 PM

This is what opens:

Screen Shot 2014-03-01 at 5.00.12 PM

The result:

Unidentified_White_Daisy_Top_View_1849px

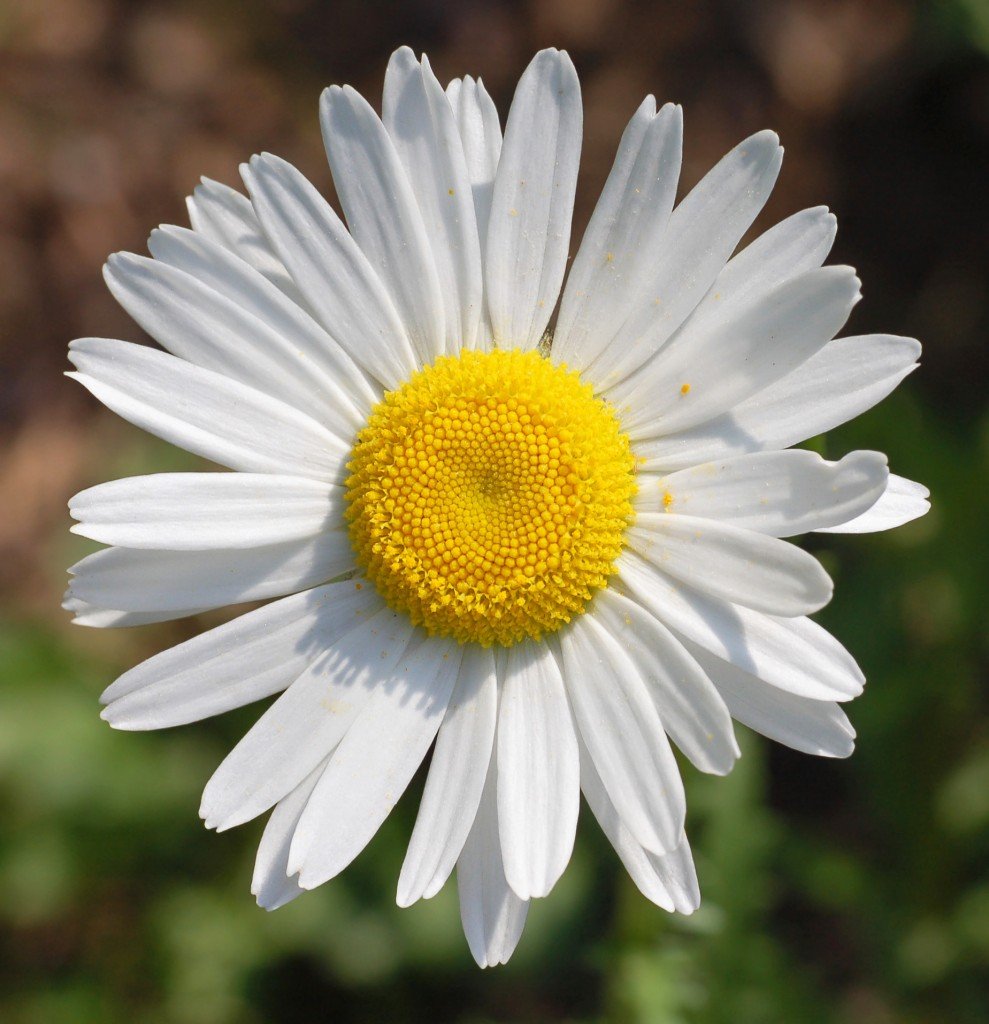
Photo by and (c)2007 Derek Ramsey (Ram-Man). Co-attribution must be given to the Chanticleer Garden. Both parties have shared, contractual copyright control. (Self-photographed) [GFDL (http://www.gnu.org/copyleft/fdl.html) or CC-BY-SA-3.0 (http://creativecommons.org/licenses/by-sa/3.0/)], via Wikimedia Commons

OR using the given code (with some minor size adjustments) it could look like this with an attribution that works on mouse hover: (Please try!)

Unidentified White Daisy Top View 1849px

Then again, other times, a student has to click around a little and do more investigation, gathering the author’s name on his/her own and trying to figure out how to type that information out into a correct format.

I’m sure elementary teachers out there are shaking their heads at me right about now thinking that this all seems a bit  lengthy, complex and way too in depth for their age level. And depending on the medium of the project, I agree.

I don’t want to be over zealous with expectations. I think it’s important to remember that we are teaching young students good habits, and modifications may be necessary to meet the age level of the student. I recall the librarian that I work with saying that when doing research with young students often the beginning expectation is to have the students write down some of the book titles (or websites) that they used. It can be very difficult for young students who have consulted a lot of sources to keep all of that information organized. It’s hard for the supervising adults to stay on top of that information for an entire class. Students over the course of the primary and elementary grades will work themselves up to keep track of all sources with more details that include authors, copyrights and publishers. Therefore, I think that our practice of copying and pasting the specific URL for the image’s location on the Internet is appropriate attribution. Especially, if we are not modifying the image, and only want to include the image in a school related project.

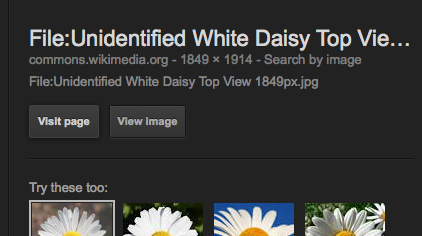
The student either could use the “File URL” from the information given on the image’s page, or at the original Google Images Search/Preview, choose View Image.

Screen Shot 2014-03-01 at 4.42.24 PM

Once the image opens full size alone, hold down the Control key + Click (Mac) or Right Click (PC) on the full size image that will open in your web browser to get the following menu:

Screen Shot 2014-03-01 at 2.58.53 PM

Choose “Copy Image Location”. This method has been what we have been using at Abbot.

The result in the project:

Unidentified_White_Daisy_Top_View_1849px

Source: http://upload.wikimedia.org/wikipedia/commons/0/03/Unidentified_White_Daisy_Top_View_1849px.jpg

(Note: I’m still not sure what wording should precede the address. Source? Attribution?)

Now, that we have made it through that scenario, we still have to consider what would happen if the image really was not free to use or share.

If a license cannot be identified or the license clearly states that attribution is not enough, the picture should NOT be used by the student. (Of course, an alternate would be contacting the author directly and asking permission. This activity could be a wonderful learning experience, and yes, sometimes permission is granted to students. However, that may not be an extended activity that you want your students to undertake.)

That’s the digital citizenship lesson that we need to be instilling.

I know that this will bring up the next logical question: With these conditions, what if students can’t find the images they need?

Well, I have been doing a bit of trolling, and lots of other people have had the same concern.

My recommendations:

Creative Commons Image Search

Larry Ferlazzo’s The Best Online Sources for Images

Also, a good read that helped me: The Educator’s Guide to Copyright, Fair Use, and Creative Commons

If you made it this far in the blog post, thanks for reading, and I’d love to chat more about this topic. Any suggestions are welcomed.

Added 3/11/14: Copyright and Fair Use Animation : A simple video that is easy enough for students to understand!

« Older EntriesNewer Entries »

Skip to toolbar